
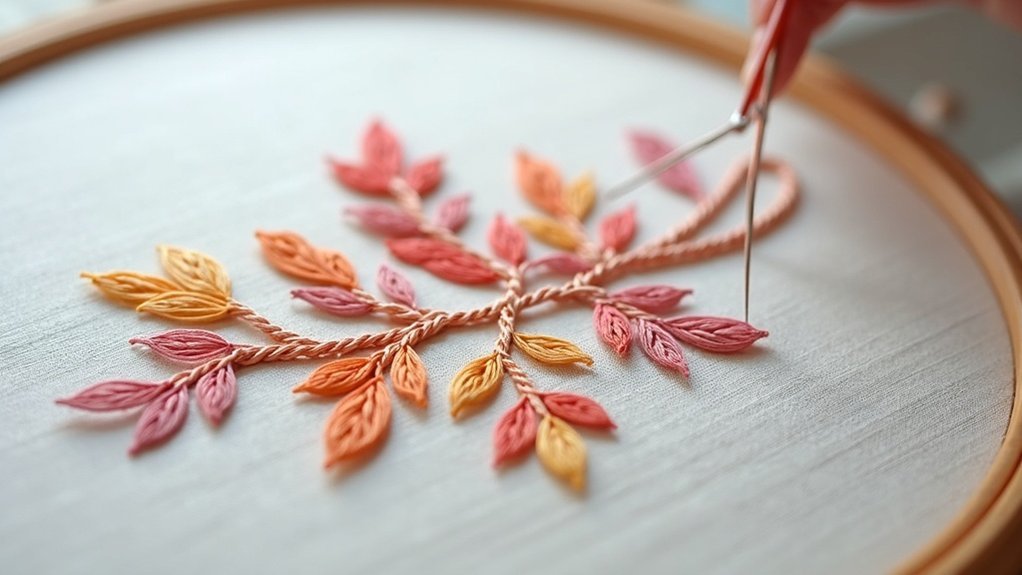
To stem stitch in embroidery, start by drawing a guiding line. Bring your needle up on the left at point A, then down at point B to form your first stitch. Continue by bringing it up at point C, ensuring it covers the working thread. Maintain consistent stitch sizes for smoothness. Experiment with thread types and lengths for variation. As you refine your technique, you’ll discover more nuances and enriching methods to enhance your projects.
Key Takeaways
- Start by drawing a temporary guide line for precise placement of your stitches.
- Bring the needle up at point A and insert it down at point B to form the first stitch.
- Continue by bringing the needle up at point C, ensuring it lies over the working thread.
- Use consistent stitch sizes to achieve a uniform and polished appearance in your embroidery.
- Experiment with thread types, such as S-twisted threads, for a refined and rope-like effect.
Overview of Stem Stitch
Stem stitch is an essential technique in the world of embroidery, celebrated for its ability to create smooth, rope-like lines that enhance both outlines and decorative details in your projects.
As you master this versatile stitch, you’ll appreciate its effectiveness as an outline stitch, especially when working from left to right.
Begin by bringing your needle and thread up at one point, and then make straight stitches, ensuring each new stitch overlaps the previous one.
Keep consistent stitch sizes for curves, and remember that using S-twisted threads will give you that desirable, polished look, elevating your work to new artistic heights.
Procedure for Stem Stitch
To start your stem stitch, draw a temporary line as a guide and bring your needle up at the beginning point, ensuring the thread lies beneath it.
As you stitch, focus on a left-to-right motion, placing your needle halfway between previous points for each new stitch, while keeping your stitch size consistent.
This attention to detail not only creates a uniform appearance but also enhances the flow around curves and corners.
Starting the Stitch
Before you plunge into your stem stitch, it’s essential to draw a temporary stitch line with a pencil, which acts as a guide for precise placement. For right-handed stitchers, start from the left. Bring the needle up at point A, then insert it down at point B. Next, bring the needle up at point C, ensuring it lies over the working thread between points A and B. Maintain consistency in stitch size, positioning point C halfway between A and B for a uniform appearance.
| Point | Action | Placement |
|---|---|---|
| A | Bring the needle up | Start the line |
| B | Insert down | Complete first stitch |
| C | Bring the needle up | Continue pattern |
Stitching Technique Overview
Begin your journey into the art of stem stitching by visualizing the fluid, rope-like line you’ll create. Start by bringing your needle up at the initial point and making a straight stitch.
Then, bring the needle up in the middle of that stitch, ensuring the working thread lies over it. Position each subsequent stitch by bringing the needle out at the end of the last one, maintaining consistent stitch sizes for uniformity.
For sharp corners, place your needle a stitch length away, diving into the corner. Keep the working thread to the right of the needle as you progress.
Maintaining Consistency in Stitches
Achieving consistency in your stem stitches greatly enhances the overall quality of your embroidery. To maintain consistency in stitches, position each stitch over the previous one, emerging halfway between the last stitch’s start and end. Keep your working thread below the needle to create that uniform rope-like effect. For corners, use smaller stitches to maintain line thickness. Always work from right to left, guaranteeing your stitches remain close together. Finally, check the twist of your thread; S-twisted threads guarantee uniformity and beauty.
| Stitch Size | Recommended Use | Notes |
|---|---|---|
| Small | Tight curves | Enhances sharp turns |
| Medium | General use | Balanced appearance |
| Large | Bold lines | Creates emphasis |
Techniques and Variations
While mastering the stem stitch, you can explore various techniques and variations that enhance both the aesthetic and structural qualities of your embroidery.
Adjusting stitch lengths and spacing allows you to create diverse stitch lines, giving your work a unique character. For tight curves, use smaller stitches to maintain neatness, while larger stitches suit straighter sections.
Experiment with thread shades for a shaded effect or closely spaced rows to fill. Additionally, combine the stem stitch with techniques like Casalguidi Embroidery for raised textures.
Practicing consistent needle placement and thread positioning guarantees uniform quality and a polished finish in your projects.
Thread Considerations
When selecting threads for stem stitching, it’s essential to take into account the twist direction and type, as these factors greatly influence the stitch’s appearance and texture.
Opt for S-twisted threads like DMC, Anchor, or perle cottons to achieve that desired rope-like effect, enhancing texture. Be cautious; some silks and rayon flosses may be Z-twisted, impacting your stitch’s final look.
Always maintain the working thread position below the needle if you’re right-handed, or above if you’re left-handed, ensuring consistency.
Thoughtful thread considerations can elevate your embroidery, allowing you to serve others with beautifully crafted designs.
Working Corners
As you explore the intricacies of stem stitching, mastering the technique of working corners is essential for creating sharp, polished designs.
Bring the needle up a stitch length from the corner, then stitch down into the corner to form a precise tip. Always maintain the working thread to the right of the needle for consistent stitch placement in your working rows of stem.
Use smaller stitches to preserve line thickness, allowing you to maintain flow and cleanliness. After reaching the top, move forward a stitch length before returning to the corner to stitch to outline, ensuring a neat appearance on the back of the fabric.
Tips for Left-Handed Stitchers
If you’re a left-handed stitcher, adapting your technique for stem stitching can make a significant difference in your results. Focus on working from right to left, keeping the thread above the needle for a polished finish. Here are some quick tips and tricks:
| Technique | Method Description | Key Considerations |
|---|---|---|
| Stab Method | Needle down and up in a straight motion | Follow right-handed methods |
| Sewing Method | Scoop fabric from right to left | Keep the thread above the needle |
| Thread Choice | Use S-twisted threads for a rope-like effect | guarantees consistent appearance |
Utilize video tutorials for clearer guidance!
Community Feedback and Support
Engaging with the embroidery community can elevate your stem stitching journey, as you share your experiences and gather insights from fellow stitchers.
You’ll find a wealth of user-generated content that sparks collaborative learning, making every question and suggestion a stepping stone toward mastery.
Community Engagement Opportunities
How can you enhance your embroidery journey through community engagement? Engaging with fellow stitchers not only sharpens your skills but also broadens your artistic perspective.
By sharing your experiences and expressing gratitude for helpful video tutorials, you foster a supportive atmosphere. Many members enthusiastically request additional resources, demonstrating a strong desire for growth in mastering embroidery stitches.
Your feedback encourages creators to develop even more content, enriching the community. Consider supporting platforms like Patreon or Amazon, ensuring sustainability for these invaluable resources.
User Experience Sharing
While you commence on your embroidery journey, sharing your user experience can greatly enrich both your skills and the community’s collective knowledge. Your progress inspires others, and by addressing requests for more tutorials, you help shape the resources available. Community members appreciate detailed instructions, fostering a supportive environment for skill enhancement. Don’t hesitate to share questions and images of your completed projects; it cultivates an interactive platform for growth.
| Feedback Type | Community Response | Suggested Improvements |
|---|---|---|
| Clarity of Tutorials | Highly appreciated | More visual guides |
| Requests for Help | Frequent inquiries | Extensive FAQs |
| Sharing Progress | Encourages participation | Monthly showcases |
Collaborative Learning Environment
Sharing your experiences not only enriches your own journey but also lays the foundation for a collaborative learning environment within the embroidery community.
When you share your work, you invite community feedback that enhances tutorials and fosters clarity. Engaging with fellow embroiderers allows you to ask questions and receive constructive advice, creating a supportive atmosphere.
Discussing troubleshooting techniques is essential; by sharing resources and insights, you tackle common challenges together. This dynamic space encourages contributions, where tips and personal experiences flourish, boosting confidence and fostering a sense of belonging among passionate artisans.
Embrace this community—your growth impacts us all.
Personal Growth and Learning Resources
As you commence on your embroidery journey, tapping into a variety of learning resources can greatly enhance your skills and foster personal growth.
Hands-on experience is essential; applying techniques like stem stitch solidifies your mastery. Video tutorials offer clear visual demonstrations, making complex methods accessible.
Engaging with online crafting communities allows you to share experiences and gather invaluable advice from seasoned embroiderers. Additionally, exploring blogs and books provides diverse perspectives on techniques.






