
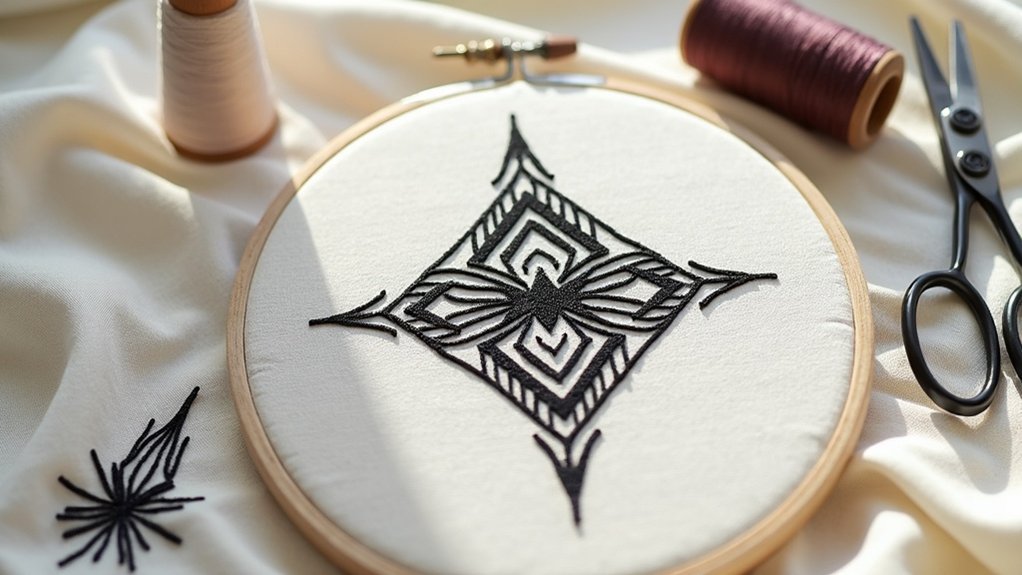
To plan geometric fills in blackwork embroidery, sketch your pattern on graph paper, ensuring harmony between shapes like diamonds and hexagons. Experiment with stitch types—consider back stitch for bold outlines and double running stitch for a clean finish. Pay attention to spacing and alignment, maintaining even proportions and consistency. Select thread thickness and colors that enhance your design. Practice on sample fabric to perfect your technique, and you’ll discover the art behind enchanting geometric fills.
Key Takeaways
- Choose cohesive geometric patterns, ensuring they align with the overall theme and complement primary motifs in color and texture.
- Maintain standard dimensions of 28 stitches wide by 27 stitches tall for proportionality and visual harmony in your design.
- Experiment with various stitching techniques, such as back stitch and double running stitch, to enhance the texture and appearance of fills.
- Draft patterns on graph paper to visualize layouts and test different fill densities for depth before finalizing your design.
- Use high-resolution images of historical patterns as references for inspiration and to ensure authenticity in your geometric fills.
Understanding Geometric Fills in Blackwork
When you immerse yourself in blackwork embroidery, understanding geometric fills becomes essential, as these repetitive patterns not only create striking contrasts against white fabric but also showcase the precision of your stitching.
Geometric fills typically incorporate shapes like diamonds, squares, and triangles, which can be combined for a rich aesthetic. Pay close attention to the vertical, horizontal, and diagonal lines within your chosen patterns to guarantee harmonious execution.
Mastering techniques like the double running stitch and back stitch will enhance your designs. Sketching your fills on graph paper allows you to visualize layouts and explore intricate designs before diving into stitching.
Selecting a Cohesive Design
When selecting a cohesive design for your blackwork embroidery, think about how your geometric patterns will harmonize with the overall theme.
Experiment with shapes like diamonds and hexagons, ensuring your color and texture choices complement each other for a unified aesthetic.
Pattern Harmony Considerations
To achieve a cohesive design in blackwork embroidery, you must carefully consider how the geometric fills interact with your primary motifs.
Focus on pattern harmony considerations; choose blackwork fill patterns that complement rather than clash with your subject matter. For instance, avoid floral fills on aquatic designs, as this disrupts visual appeal.
Opt for intuitive patterns that align with your project’s themes. Experiment with variations in density and scale to create balance, ensuring the fills enhance, rather than overwhelm, the main features.
Thoughtful selection of patterns elevates the unity and beauty of your blackwork masterpiece, making it truly enchanting.
Geometric Shape Variations
While exploring geometric shape variations in blackwork embroidery, it’s essential to verify that your chosen shapes not only complement each other but also fit seamlessly within the overall design.
By experimenting with various geometric fills, like alternating hexagons and triangles, you can create unique, visually engaging compositions. Guarantee consistent spacing and alignment among your geometric shapes to maintain a balanced finish.
Drawing inspiration from historical patterns, such as those at the Victoria and Albert Museum, can guide you in crafting cohesive motifs.
Ultimately, these variations enhance the aesthetic appeal, inviting admiration and serving others through your beautifully designed work.
Color and Texture Balance
Selecting a cohesive design in blackwork embroidery requires careful attention to color and texture balance. Choose geometric fills that enhance visual harmony, ensuring they complement your overall design.
Using black silk thread on a smooth linen background creates a striking contrast and sophistication. Balance is essential; mix medium to dark density fills with lighter patterns for dynamic interest.
Pay attention to scale—larger fills can overwhelm smaller motifs, while intricate fills add detail to expansive areas. Before committing, test your color and texture choices on a small sample piece to see how they react under different lighting conditions.
Sketching Your Pattern
Studying existing blackwork fill patterns reveals the intricate interplay of geometric shapes and their arrangements, laying a solid foundation for your own design.
Grab some graph paper to sketch your patterns, ensuring precise stitch placement within your chosen dimensions, like a 28 by 27 stitch area. Doodle various geometric fills, experimenting with shapes and arrangements that inspire unique designs.
Always consider the overall aesthetic; the fills should complement your subject, avoiding mismatched patterns. Document your sketches and any adjustments you make, as these will serve as invaluable references during stitching and for future projects, enhancing your creative journey.
Choosing the Right Stitch Type
After sketching your patterns, the next step involves choosing the right stitch type to bring your geometric fills to life.
Consider these options to enhance your work:
- Back stitch: Perfect for bold outlines, it frames your designs beautifully.
- Double running stitch: This reversible stitch gives a clean finish, ideal for both sides of your fabric.
- Holbein stitch: Excellent for outlining, it maintains sharp lines in your geometric patterns.
Considering Thread Thickness and Color
When you’re planning your geometric fills, the thickness of your thread plays an essential role in defining your design’s impact. A thicker thread creates bold, striking patterns, while a finer option allows for delicate details and subtleties.
Don’t forget to experiment with color choices, as traditional black can be stunning, but vibrant alternatives like red or gold can add an eye-catching twist to your work.
Thread Weight Considerations
Choosing the right thread weight is essential for achieving the desired visual impact in blackwork embroidery. The thickness of your thread shapes the overall look of your geometric patterns.
- Thicker threads, like 20/2 spun silk, create bold outlines and fills.
- Thinner threads, such as Anchor stranded thread, reveal intricate details.
- Fabric count matters; using 22-count Hardanger fabric enriches how thread interacts with the weave.
Testing thread thickness on a fabric scrap guarantees compatibility and helps you achieve the perfect effect.
Color Harmony Choices
Understanding thread weight naturally leads to exploring color harmony in your blackwork embroidery. Selecting the right thread thickness enhances your geometric fills; finer threads suit higher fabric counts, preserving detail.
Contrast is key—deep black threads on white linen make your designs pop. Experiment with shades within the same color family to create depth while maintaining cohesion.
Varying thread thicknesses adds texture: bold outlines with thicker threads and intricate designs with thinner ones.
Always test your choices on a scrap piece of fabric to guarantee your colors and thicknesses harmonize beautifully in your final piece, elevating your embroidery to serve others’ visual delight.
Practicing on Sample Pieces
As you commence on the journey of mastering geometric fills in blackwork embroidery, practicing on sample pieces becomes essential.
Start by drafting patterns on graph paper to visualize your layout. Use various stitches to fill in the gaps and create clean outlines.
Consider these techniques:
- Experiment with back stitches or double running stitches for precision.
- Test different fill densities, noting how medium to dark patterns enhance depth.
- Stitch isolated sections on test fabric to guarantee accuracy before the final piece.
Document your practice with high-resolution photos to analyze and refine your techniques over time.
Your dedication will elevate your artistry in blackwork.
Ensuring Even Spacing and Alignment
Achieving even spacing and alignment in your geometric fills is essential for a polished blackwork embroidery piece. Start by measuring and marking your fabric with a grid, ensuring consistent intervals between stitches. Draft your design on graph paper, allowing for precise visualization and alignment of shapes before transferring them.
While stitching, maintain consistent thread tension to avoid size variations that disrupt alignment. Regularly check your progress against the original pattern, adjusting as needed.
Consider using a tapestry needle with a large eye to create uniform holes, enhancing spacing between stitches and ensuring a clean, cohesive look in your work.
Finalizing Your Design for Stitching
With your geometric fills aligned and evenly spaced, it’s time to finalize your design for stitching.
Finalize your design by ensuring geometric fills are aligned and evenly spaced for a polished stitching outcome.
Analyze your fill patterns to verify they enhance the overall aesthetic. Consider these key aspects:
- Dimensions: Stick to the typical 28 stitches wide and 27 stitches tall for proportion.
- References: Use high-resolution images of historical patterns for inspiration.
- Techniques: Experiment with stitches like Holbein or back stitch for clear outlines.






