
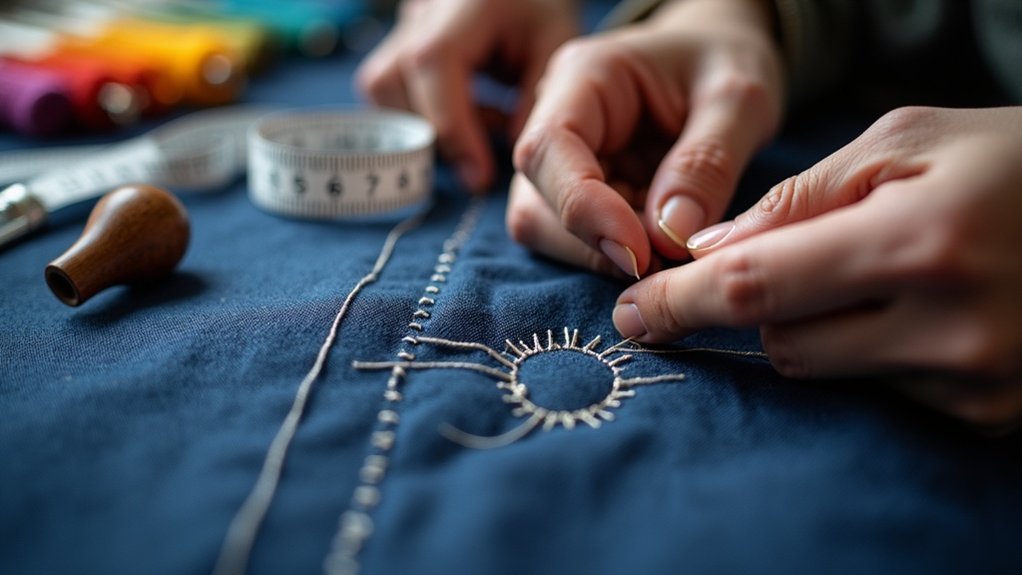
To maintain consistent stitch length in sashiko embroidery, aim for a range of 2 mm to 7 mm. Focus on the 3:2 stitch ratio and keep your stitches separate to enhance design clarity. Use grid patterns or pre-printed panels for practicing uniformity. Pay close attention to tension and aim for 2-3 stitches per centimeter. Regular inspection of your work can help you catch discrepancies early. Stick with it, and you’ll uncover even more tips for perfecting your technique.
Key Takeaways
- Use pre-printed panels or grid patterns to visualize and practice consistent stitch lengths effectively.
- Maintain a stitch length between 2 mm and 7 mm for aesthetic appeal and structural integrity.
- Focus on keeping a 3:2 ratio between top and back stitches for uniformity in design.
- Regularly inspect your work to ensure even tension and proper stitch separation.
- Engage with the sashiko community for tips and techniques to enhance your stitching skills.
Understanding Stitch Length in Sashiko
In Sashiko embroidery, stitch length serves as the backbone of your design, influencing both its visual appeal and structural integrity.
Traditional Sashiko often features a stitch length on the right side that’s 1.5 times longer than on the wrong side, achieving a striking 3:2 visual ratio.
In traditional Sashiko, the right side’s stitch length is 1.5 times longer than the wrong side, creating a captivating 3:2 ratio.
To create a cohesive look, maintaining consistent stitch lengths between 2 mm and 7 mm is essential. Avoid crossing stitches at intersections, as this can cloud your design’s clarity.
You can refine uniformity by intentionally adjusting preceding stitches. Utilizing grid patterns in Hitomesashi can also help you practice achieving those consistent stitch lengths effectively.
Recommended Stitch Lengths for Patterns
How can you guarantee your Sashiko patterns maintain their intended beauty and structure?
Start by adhering to recommended stitch lengths, typically ranging from 2 mm to 7 mm. Ascertain top stitches are about 1.5 times longer than those on the back, maintaining a 3:2 ratio.
For grid-style patterns like Hitomesashi, let the grid size dictate your stitch length for uniformity. As a beginner, practicing on pre-printed panels helps you master these lengths.
Techniques for Consistent Stitching
To achieve consistent stitching in Sashiko, focus on adjusting your stitch lengths meticulously to maintain that perfect 3:2 ratio between the right and wrong sides.
Pay close attention to your tension; even slight variations can disrupt the uniformity of your design.
Adjusting Stitch Lengths
While you commence on your Sashiko embroidery journey, mastering stitch length is essential for achieving a polished look.
To guarantee consistent stitch lengths, make earlier stitches slightly smaller to balance any variations. Aim for 2-3 stitches per cm, keeping back stitches one-third the length of top stitches for visual harmony.
Use pre-printed patterns or grid guides to help visualize stitch lengths and maintain uniformity. Inspect your work regularly; if stitches shrink, gently pull the needle to ease tension.
With practice, your Sashiko stitching will become a reflection of your dedication and attention to detail, delighting those you serve.
Maintaining Even Tension
Achieving uniform stitch lengths isn’t just about the size of your stitches; it’s also about maintaining even tension throughout your work.
Gently pull the thread, avoiding puckering that disrupts stitch uniformity. A thimble can help push the needle smoothly, ensuring consistent Sashiko stitches.
Aim for a stitch density of 2-3 stitches per cm for ideal appearance. Remember, the backside stitches should be about 1/3 the length of the top stitches to maintain the traditional Sashiko stitch ratio.
Regularly inspect your work to catch discrepancies in length or tension, allowing you to adjust before finalizing your beautiful design.
The Importance of Stitch Separation
Maintaining proper stitch separation in Sashiko embroidery isn’t just a matter of aesthetics; it plays a critical role in the overall integrity of your design. When stitches touch, they can blend or distort patterns, compromising your work’s visual appeal.
Aim for a stitch density of 2-3 stitches per centimeter, ensuring careful spacing to maintain uniformity. Remember, while flexibility in stitch separation fosters creativity, a consistent approach elevates your Sashiko designs.
Avoid crossing stitches at intersections to preserve clarity. Balancing stitch separation with stitch length is essential for achieving that desired aesthetic, so practice refining this crucial aspect in your embroidery journey.
Adapting to Stitch Length Variations
When you notice variations in your stitch lengths, adjusting your techniques can make a significant difference.
By practicing consistent stitch spacing and experimenting with smaller stitches preceding larger ones, you can create a more uniform appearance.
Engaging with these adjustments not only enhances your skill but also adds depth to your Sashiko designs.
Adjusting Stitch Techniques
To guarantee your Sashiko embroidery flows seamlessly, it’s crucial to adapt your stitch techniques to accommodate variations in stitch length. You can ascertain consistent aesthetics by making preceding stitches smaller if following ones appear larger. Remember not to let stitches touch and adjust lengths deliberately to create harmony.
| Adjustment Technique | Purpose |
|---|---|
| Elongate Stitches | Achieve visual flow |
| Shorten Preceding | Balance larger succeeding stitches |
| Mind Direction Changes | Maintain consistent ratios |
Practice on smaller projects to refine your skills in adjusting stitch lengths, leading to a more instinctive stitching approach.
Consistent Stitch Spacing
Consistent stitch spacing is essential for achieving a polished look in your Sashiko embroidery. Aim for a separation of 2-3 stitches per centimeter, ensuring they don’t touch, which enhances your design.
When variations in stitch length occur, adjust by making the previous stitch smaller to balance the visual effect. Keeping backside stitches about one-third the length of top stitches creates harmony.
Using pre-printed patterns helps guide spacing, allowing you to focus on technique. Regularly inspecting your stitches during the process enables you to catch inconsistencies early, preserving the integrity of your Sashiko project while ensuring consistent stitch spacing.
Community Tips for Maintaining Uniformity
How can you tap into the wealth of knowledge within the sashiko community to enhance your stitching uniformity? Engage with fellow enthusiasts to share tactics for maintaining consistent stitch lengths and perfecting your technique.
As Kerrie Barker suggests, adjust the length of preceding stitches to create an illusion of uniformity.
Adjusting the length of previous stitches can create a beautiful illusion of uniformity in your sashiko work.
Margaret Anderson emphasizes keeping stitches separate to avoid frustration.
Toni Harms recommends deliberately lengthening stitches for visual appeal.
Consider practicing on smaller projects like coasters, allowing you to refine your skills with embroidery floss.
Collaboration and shared experiences can elevate your sashiko craftsmanship to new heights of precision and beauty.
Practicing for Better Stitch Control
Achieving better stitch control in sashiko embroidery is essential for creating beautiful, uniform designs.
To enhance your skills, try these techniques:
- Practice on small projects like coasters or bookmarks to build confidence in stitch lengths.
- Use a ruler and fabric marker to measure and mark consistent stitch lengths for better visualization.
- Experiment with various needle lengths and types to find what facilitates smoother stitching.
- Make the preceding stitch smaller to adjust subsequent stitches, ensuring improved consistency.






