
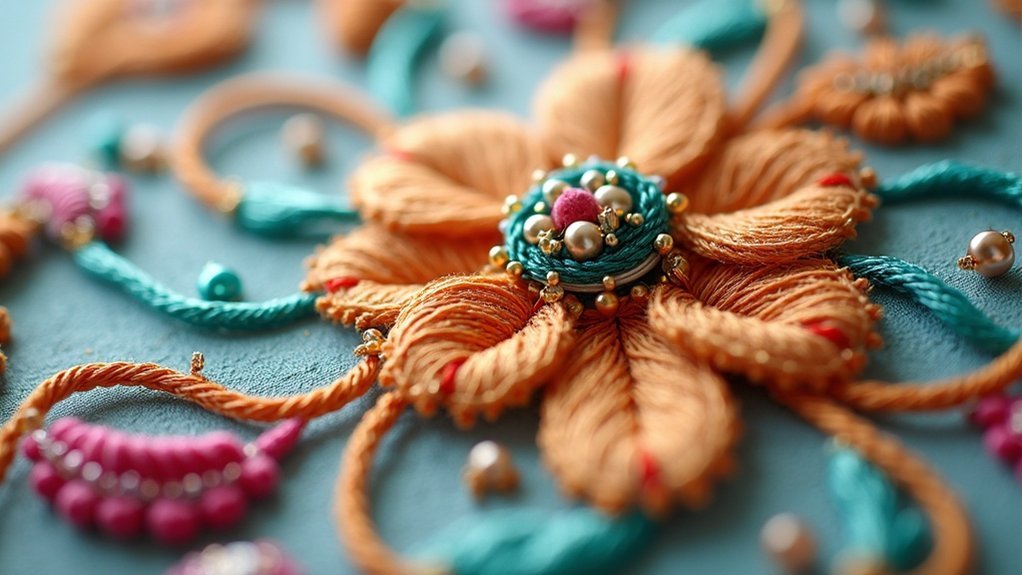
To integrate beads into your embroidery motifs, choose designs with open spaces or geometric shapes that let beads shine. Pick the right bead types—Czech or Japanese seed beads for finesse, and bugle beads for unique shapes. Plan bead placement carefully for balance and visual impact, securing them with strong threads and stitches. Experiment with sizes and colors for a playful touch, enriching your texture. Keep exploring how various stitches and techniques can elevate your creations further.
Key Takeaways
- Choose motifs with open spaces or defined outlines to allow beads to breathe and enhance the design.
- Plan bead placement by visualizing and using guidelines for even spacing, adjusting for balance.
- Securely attach beads with long thread legs, double threads, and anchor stitches to ensure durability.
- Use a variety of bead sizes and shapes to create texture, contrast, and focal points in your embroidery.
- Regularly assess your design from a distance to ensure bead placements complement the overall motif without overwhelming it.
Selecting the Right Motif for Beading
When it comes to selecting the right motif for beading, how do you guarantee your design truly shines? Embrace motifs with open spaces or defined outlines; they let your beads breathe, preventing overcrowding.
Floral and nature-inspired designs work wonders, allowing beads to imitate dew drops or vibrant flower centers. Geometric patterns provide a structured backdrop, enhancing your beads’ sparkle.
Think about bead size—smaller beads fit intricate designs, while larger ones can stand out in simpler motifs. Don’t hesitate to layer beads over stitched patterns, adding depth and texture, and watch your embroidery transform into a mesmerizing work of art.
Choosing Bead Types and Sizes
As you immerse yourself in the world of beading, choosing the right types and sizes of beads can make all the difference in your embroidery’s impact.
Opt for Czech or Japanese seed beads; their smoothness minimizes thread wear and enhances your design’s finish. For delicate fabrics, smaller seed beads work best, ensuring they blend seamlessly without overpowering your stitching.
While bugle beads offer unique shapes, their rough edges require careful pairing with seed beads to protect your thread.
Planning Bead Placement
As you start to visualize your design, think about how your chosen beads will weave into the fabric of your embroidery.
Picture the colors and shapes dancing together, enhancing the motifs rather than overshadowing them.
With a few strategic placements, you can transform your piece into a stunning work of art that captivates the eye.
Visualizing Design Concepts
To bring your embroidery vision to life, start by sketching your design on paper, pinpointing where beads can elevate the visual interest and texture of your motifs.
Use these steps to visualize where beads will be placed:
- Draw guidelines on fabric with a fabric marker for even spacing.
- Choose bead colors and sizes that enhance your thread and fabric.
- Temporarily pin beads in place or use double-sided sticky tape for previews.
- Regularly step back to assess your design.
- Adjust bead placements to complement your embroidery stitches without overwhelming the piece.
These techniques will help you beautifully integrate beads to your embroidery!
Choosing Bead Types
How do you choose the right beads for your embroidery project? Start with Czech or Japanese seed beads; their smoothness and consistent sizing enhance your bead embroidery’s integrity.
When using larger beads, like bugle beads, place seed beads at both ends to protect your needle and thread from rough edges. Consider the bead size relative to your fabric—smaller beads suit finer linens for balance.
Don’t forget color and shape; contrasting or harmonious beads elevate your design’s visual appeal. Finally, keep your chosen beads organized on a bead mat or in a bowl to streamline your planning and placement.
Techniques for Securely Attaching Beads
When you’re ready to enhance your embroidery with beads, mastering secure attachment techniques is key to achieving stunning results.
Consider these methods for a durable finish:
- Use a long thread leg for extra support.
- Incorporate two threads to reinforce the bead’s hold.
- Take a second pass with split strands around the bead.
- Employ anchor stitches like fly stitch or detached chain stitch for seamless integration.
- Choose beading thread to withstand rough edges and prevent fraying.
Enhancing Design With Bead Variation
While you weave your embroidery with beads, embracing variation in bead size, shape, and color can transform your design into a vibrant masterpiece.
By adding smaller beads as accents and larger ones as focal points, you bring depth to your motif. Experiment with different shapes—round, bugle, and teardrop—to enhance texture and create dynamic contrasts.
Incorporate beads in contrasting colors to draw attention and guide the eye. Layering them over existing stitches adds a tactile dimension, while playful placements, like clustering or even spacing, invite creative freedom.
Let your design reflect your unique vision, serving others with beauty and artistry.
Combining Beads With Different Stitches
When you start combining beads with different stitches, the magic really happens.
Picture the elegance of a basic running stitch anchoring beads in a graceful line or the playful texture created by laced stitches.
Each stitch type offers a unique way to showcase your beads, transforming your embroidery into a enchanting work of art.
Stitch Types for Beads
Integrating beads into your embroidery can transform simple stitches into stunning, textured designs, enhancing the overall visual appeal.
When you’re adding beads, consider these stitch types to elevate your work:
- Running Stitch: Anchor beads at intervals for added texture.
- Laced and Whipped Running Stitches: Create dimension while placing beads decoratively.
- Fly Stitch: Showcase beads as unique focal points.
- Buttonhole Stitch: Incorporate beads post-stitching for versatile design flow.
- French Knots: Use tiny seed beads for intricate detailing.
With your needle in hand, experiment with these techniques to bring your embroidery motifs to life!
Bead Placement Techniques
As you explore bead placement techniques, you’ll find that the combination of different stitches can create enchanting visual effects in your embroidery. Anchor stitches like the fly stitch can be enhanced with beads, adding dimension. Incorporate beads into running stitches by anchoring them at intervals for consistency. Using buttonhole stitch allows you to secure beads, making adjustments easier. Experiment with laced or whipped running stitches to add texture. Place beads at angles for dynamic flow.
| Stitch Technique | Bead Placement Effect |
|---|---|
| Running Stitch | Consistent decorative effect |
| Buttonhole Stitch | Easy adjustment of beads |
| Fly Stitch | Enhanced visual interest |
Tips for Maintaining Design Cohesion
To guarantee your beads enhance the overall embroidery design rather than distract from it, focus on creating a harmonious color palette that ties both threads and beads together.
Ensure your beads complement your embroidery by crafting a cohesive color palette that unites threads and beads beautifully.
Consider these tips for maintaining design cohesion:
- Use a consistent color scheme for threads and beads.
- Match bead size and shape to the motif’s delicacy or boldness.
- Place beads in focal areas to boost visual interest.
- Seamlessly integrate beads using techniques like laced or anchor stitches.
- Step back periodically to assess the overall cohesiveness and visual appeal.






