
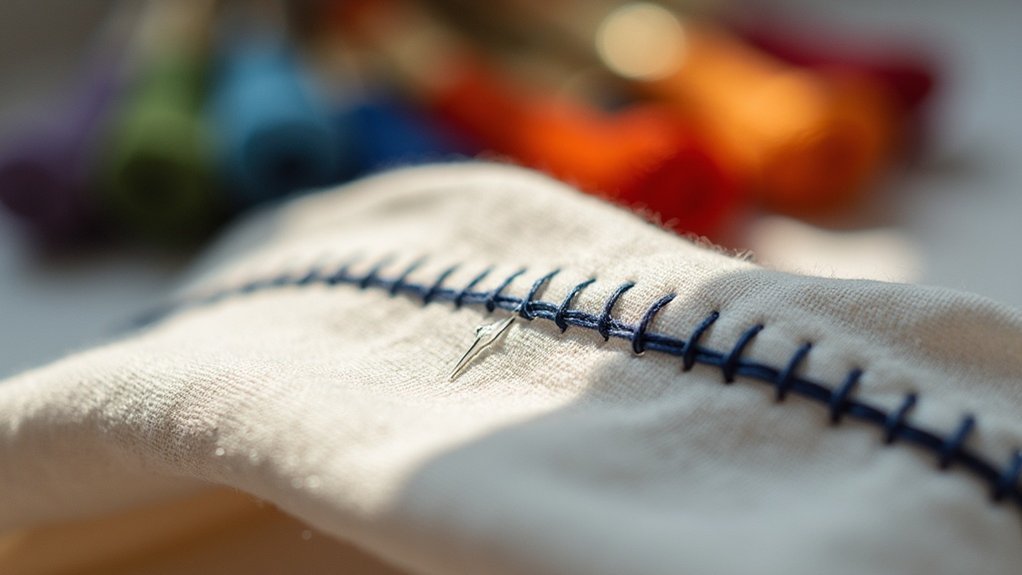
To blanket stitch in embroidery, start with your felt layers wrong sides together. Use a larger needle for your thick embroidery floss, hiding the knot inside the layers. Bring the needle out to the left of your last stitch, loop the thread, and insert back into the fabric. Keep your stitches evenly spaced for a neat finish, especially around corners. As you practice, you’ll find ways to enhance your technique and explore fun variations!
Key Takeaways
- Prepare felt layers by placing them wrong sides together and hide the knot between the layers for a neat appearance.
- Bring the needle out to the left of the exit point, then create a loop by inserting the needle from back to front.
- Maintain consistent spacing and tension throughout your stitches to achieve a uniform and polished edge.
- To navigate corners, secure the last stitch before the corner and insert the needle at the same point for the next stitch.
- Experiment with variations like Double Blanket Stitch or Whipped Blanket Stitch to enhance your embroidery projects creatively.
Tools and Materials
To successfully execute a beautiful blanket stitch in embroidery, you’ll need a few essential tools and materials at your fingertips.
Start with an embroidery needle, which has a larger eye for threading thicker embroidery floss. Choose your floss wisely; you can use all six strands for a bold look or separate them for finer stitches.
Felt fabric is perfect for this technique, as it’s durable and resists fraying. Don’t forget your scissors for trimming excess thread, ensuring a polished finish.
A thimble can protect your fingers when pushing the needle through multiple layers, making your stitching process more comfortable.
Sewing the Blanket Stitch From Edge to Edge
To start sewing the blanket stitch from edge to edge, you’ll want to prepare your felt layers by placing them wrong sides together, hiding your knot for a tidy look.
As you execute the stitch technique, focus on maintaining even spacing for a polished finish.
Finally, remember to secure your stitches properly to guarantee your work stays intact and ready for use.
Preparing Felt Layers
While you prepare your felt layers for the blanket stitch, start by placing the wrong sides together. This guarantees a neat finish on the right side. Hide the knot between the layers to keep your project looking clean.
Next, bring the needle out of the front layer, positioning it to the left of the exit point of the floss. Create a loop by inserting the needle from back to front, pulling it through for a vertical bar stitch. Keep stitching consistently along the edge for an even, professional result.
| Step | Action |
|---|---|
| 1 | Place wrong sides together |
| 2 | Hide the knot |
| 3 | Bring needle out |
| 4 | Create a loop |
Executing Stitch Technique
Now that your felt layers are prepared and ready, it’s time to execute the blanket stitch technique.
Begin by placing the wrong sides together, hiding your knot between them. For the first stitch, insert the needle to the left of the floss exit point, pulling the floss through to create a loop. Insert the needle back down through the loop.
Maintain consistent spacing by inserting the needle to the left of the last stitch. For corners, finish the last stitch before the corner, then continue at the same point.
Finally, finish the blanket stitch by creating a knot to secure your work.
Finishing and Securing Stitches
Finishing and securing your blanket stitch is essential for achieving a polished look. To guarantee a seamless finish, follow these steps:
- Complete the last stitch by passing the needle under the first stitch before tying a knot.
- Knot your floss and push the needle through to the back layer of felt, hiding the knot for a clean finish.
- If you run out of floss, knot a new piece and insert it into the last stitch, keeping both knots concealed.
Remember to maintain consistent spacing and tension throughout, especially at corners, for a beautiful, even edge in your work.
How to Sew All the Way Around an Object
To sew all the way around an object with a blanket stitch, start by securing your thread with a half stitch at your chosen starting point, hiding the knot between the layers of fabric.
As you stitch along, maintain even spacing and a consistent distance from the edge for a uniform look. When you reach a corner, complete the last blanket stitch at the inner point and continue from there to create a clean turn.
Maintain even spacing and a uniform distance from the edge for a polished blanket stitch finish.
If you need to, tie a new piece of floss to the existing thread, ensuring both knots are tucked beneath the previous stitches.
Keep stitching!
How to Blanket Stitch Around Corners
When you’re ready to blanket stitch around corners, it’s essential to guarantee your last stitch before the corner is anchored securely at the inner point.
Here’s how to achieve perfect corners:
- Insert the needle into the same point for the next corner stitch to maintain continuity.
- For sharp corners, pass one stitch through the corner points before turning.
- Keep the spacing between stitches consistent for a uniform appearance.
Practice on scrap felt to build confidence.
With each stitch, you’ll create beautiful fabric edges that serve others well and elevate your embroidery projects. Enjoy the process!
What to Do When You Run Out of Floss
Have you ever found yourself running out of floss in the middle of a project? Don’t worry; it’s an easy fix!
First, knot the end of your old thread securely at the top of the last completed stitch to prevent unraveling. Next, insert the needle into the knot and pull until the new knot sits against it, keeping it hidden between the layers of felt.
Use a new piece of floss and insert the needle to the left of the last stitch, continuing your blanket stitch for a seamless look. This way, you’ll maintain a neat appearance while shifting between threads.
Practicing Your Stitching
To get started with practicing your blanket stitch, choose felt coasters as your fabric; they’re easy to work with and won’t fray.
Use contrasting embroidery floss so you can clearly see your stitches and make adjustments as needed.
Don’t hesitate to experiment with different stitch lengths and spacing to find what feels right for you!
Choosing Practice Fabrics
Choosing the right fabric for practicing blanket stitch is essential for honing your skills effectively. Here are some great options to evaluate:
- Felt fabric: It has a stable edge that prevents fraying, making it perfect for beginners.
- Medium-weight fabrics: These offer a balance between ease of stitching and structure, giving you better control.
- Fabric scraps: Use leftover pieces from past projects to minimize waste while experimenting with colors and textures.
Start with contrasting embroidery floss to easily see your stitches.
Avoid slippery or stretchy fabrics to prevent uneven stitches and boost your confidence as you practice!
Experimenting With Stitch Lengths
How can varying your stitch lengths transform your blanket stitch into a more dynamic element of your embroidery? By experimenting with different stitch lengths, you can create artistic variations, like the Long & Short Blanket Stitch.
Start by practicing on scrap felt pieces, gradually increasing your stitch lengths while maintaining consistent spacing between stitches. Aim for a uniform distance to guarantee professionalism.
Use contrasting thread colors to enhance visibility, helping you spot inconsistencies in length and tension. Finally, document your results with notes or photos, providing a valuable reference for future projects and tracking your progress in mastering stitch lengths.
Variations of Blanket Stitch
While exploring the world of embroidery, you’ll find that variations of the blanket stitch can add unique flair to your projects.
Here are three exciting options to contemplate:
- Double Blanket Stitch: Create depth by adding a second row of stitches, enhancing texture.
- Whipped Blanket Stitch: Weave a contrasting thread over your stitches for extra color and visual interest.
- Blanket Scallop Stitch: Layer tiny blanket stitches over scallop shapes, perfect for decorative borders.
Experiment with these variations like the Long & Short Blanket Stitch or the Closed Blanket Stitch, and let your creativity shine!






