
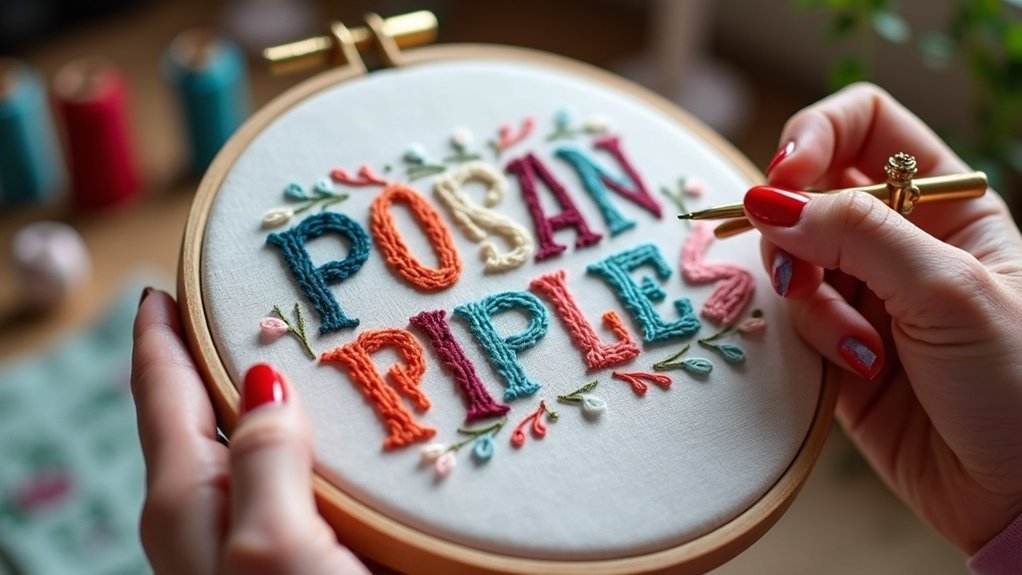
To stitch typography in embroidery, start by tracing your letters using a simple font with a lightbox or sunny window. Use a washable fabric marker for precise outlines. Essential stitches like Stem and Woven Back Stitch create clean, textured letters. For curves, keep stitches small and even, ensuring smooth lines. Experiment with Couching and Palestrina Stitches for added dimension. Securely finish your threads and explore the beauty of variegated threads for vibrant designs. There’s much more to discover!
Key Takeaways
- Choose an easy-to-read font and use a lightbox or sunny window for tracing your letters onto fabric.
- Use a washable fabric marker for tracing to avoid permanent marks on your project.
- Practice essential stitches like Stem Stitch and Woven Back Stitch on scrap fabric to build confidence and skill.
- For curves, start stitching from the bottom and use smaller stitches to maintain smoothness and avoid gaps.
- Experiment with various stitches, such as Cable Chain and Palestrina, to add texture and visual interest to your typography.
Tracing Letters for Embroidery
When you’re ready to begin your embroidery project, tracing letters onto fabric is an essential step that can greatly enhance your final results.
Choose a simple font that’s easy to read and trace. Use a lightbox or a sunny window to backlight your fabric, making it easier to see your letters. Grab a fabric marker that will wash out later, ensuring no permanent marks spoil your work.
Before diving into your final project, practice stitching on scrap fabric to build your confidence. This preparation not only sharpens your skills but also guarantees a beautiful, polished finish for those you serve.
Essential Stitches for Typography
When it comes to stitching typography, choosing the right techniques can make all the difference.
You’ll want to reflect on the stem stitch for clean outlines or the woven back stitch for a textured finish that adds depth.
Each stitch brings its own flair, so let’s explore how to match them with your letter designs for maximum impact.
Recommended Stitch Techniques
To achieve stunning typography in embroidery, you’ll want to master a few essential stitch techniques that bring your letters to life. Consider using the Stem Stitch for sleek outlines, and the Woven Back Stitch to add texture with consistency. The Couching Stitch allows you to create bold designs by layering threads, while the Cable Chain Stitch offers flexibility in style. Ultimately, the intricate Palestrina Stitch can elevate your work, especially with variegated threads.
| Stitch Technique | Effect |
|---|---|
| Couching Stitch | Bold, decorative designs |
| Back Stitch | Slim, uniform outlines |
| Chain Stitch | Flexible, chain-like look |
| Palestrina Stitch | Intricate, textured finish |
Letter-Specific Stitch Applications
Mastering letter-specific stitch applications can transform your embroidery projects, allowing you to tailor techniques to each character’s unique shape and style.
For the letter ‘S’, use the stem stitch starting from the bottom, keeping the loop on the outside for a polished look.
When crafting ‘A’, apply the woven back stitch to create depth by first establishing a back stitch base. The cable chain stitch works best when starting at the tip, ensuring smooth links.
Always manage crossovers in back stitch to maintain clean lines, and finish by weaving your thread under small stitches for a neat, professional appearance.
Techniques for Stitching Curves
When you’re stitching curves, like in the letter ‘S’, start from the bottom and work your way up to keep the loop smooth and consistent.
Don’t forget to adjust your stitch size, using smaller stitches for tighter curves to avoid gaps that disrupt the flow.
Keep an eye on your tension throughout; a steady grip helps you achieve that polished look you’re aiming for.
Managing Curved Stitches
As you commence on the journey of stitching curves, you’ll find that using small forward stitches with a consistent length is essential for creating a smooth, uniform line that gracefully follows the shape of your design.
Here are some tips to manage those curves effectively:
- Shorten your stitches around tight curves to prevent puckering and guarantee a cleaner finish.
- For the Stem Stitch, keep the loop toward the outside of the curve, allowing a natural flow.
- In the Back Stitch, stop short of crossing lines, leaving space for subsequent weaving to achieve a polished look on the back of the fabric.
Adjusting Tension Techniques
Achieving the perfect tension while stitching curves is essential for creating clean, professional-looking embroidery. Start by adjusting tension; tighter tension defines your stitch, while looser tension softens it.
When maneuvering tight curves, shorten your stitch length to guarantee control. As you stitch, pull the thread gently, keeping your needle underneath to maintain an even line.
For back stitches that overlap, stop just before the crossover point to preserve the curve’s integrity. Finally, weave the end thread under previous stitches to secure it, assuring consistent tension across your design.
Your attention to these details will truly elevate your embroidery work!
Adding Texture and Visual Interest
To truly elevate your embroidered typography, adding texture and visual interest is essential.
You can create stunning effects by experimenting with different stitches. Here are three techniques to contemplate:
- Woven Back Stitch: Make sure to pull the needle through the base stitch, wrapping the thread to enhance depth.
- Cable Chain Stitch: This creates a dimensional effect, drawing attention to your lettering.
- Palestrina Stitch with Variegated Threads: This introduces color shifts, adding intricacy.
These techniques not only enrich your design but also invite admiration from those you serve with your artistry.
Securing Thread Ends for a Neat Finish
After enhancing your design with unique textures, the next step is ensuring your thread ends are secured for a polished finish.
To secure thread ends, weave the main thread underneath the back of the fabric, tucking it under several existing stitches. This prevents unraveling and keeps everything tidy.
Maintain consistent tension while stitching to avoid gaps caused by loose ends. When finished, pull the thread through to the back before cutting to avoid fraying.
If needed, use a small knot but tuck it away neatly. Remember, it’s the little things that create a professional look in your embroidery project.
Exploring Variegated Threads and Their Benefits
While experimenting with different threads, you’ll find that variegated threads can elevate your embroidery projects to new heights.
These threads offer unique color shifts that add depth and dimension to your typography. Here are three key benefits:
- Dynamic Designs: Variegated threads create striking effects without frequent thread changes.
- Time-Saving: Reduce the need for multiple colors, allowing you to focus on your stitch technique.
- Creative Possibilities: Explore a range from subtle gradients to bold contrasts, enhancing your artistic expression.
Embrace the beauty of variegated threads to enrich your embroidery and delight those you serve.






