
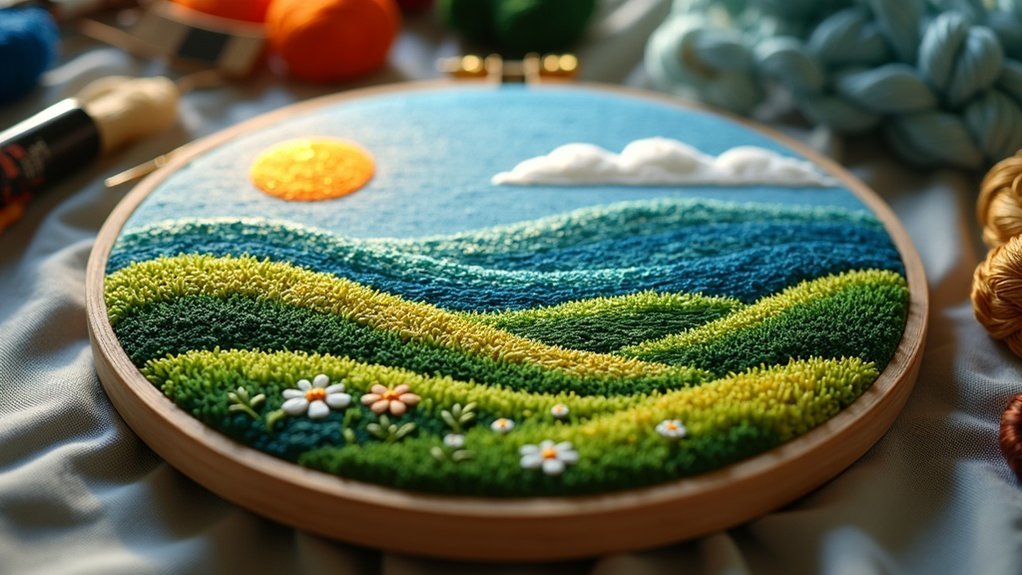
To stitch landscapes in embroidery, start by selecting a meaningful image and simplifying it into a coloring page using Lunapic.com. Gather supplies like a small embroidery hoop, muslin, and colorful threads. Plan your design layout with thumbnail sketches, focusing on essential elements. Transfer your design using carbon paper, then secure the fabric in the hoop. Use techniques like satin stitch and back stitch to bring your landscape to life. Discover more tips to enhance your finishing touches.
Key Takeaways
- Select a landscape image that has clear contrasts and key elements to guide your stitching process effectively.
- Prepare your supplies, including an embroidery hoop, fabric, threads, and needles, ensuring you have various colors for depth.
- Create thumbnail sketches to explore layout options, focusing on the arrangement of foreground, midground, and background elements.
- Use carbon tracing paper to transfer your design onto the fabric, making sure to secure it tightly in the hoop for even tension.
- Apply various stitching techniques like satin stitch and back stitch to enhance texture and detail, finishing with borders or framing for presentation.
Selecting Your Landscape Image
When selecting your landscape image, what speaks to you the most? Choose a scene that resonates personally; perhaps it’s from a cherished trip, enhancing your emotional connection to the landscape embroidery.
Use tools like Lunapic.com to convert your image into a coloring book page, simplifying its design for stitching. Focus on key elements—horizon lines, trees, and flowers—ensuring balance in your composition.
Envision your embroidery hoop by drawing a circle around your area of interest. Opt for images with clear contrasts in color and texture; these details will elevate your stitching techniques and overall visual appeal.
Preparing Your Supplies
To commence your landscape embroidery journey, you’ll need to gather a handful of essential supplies that will set the foundation for your masterpiece.
Start with a small embroidery hoop to guarantee your fabric remains taut as you stitch. Choose muslin or linen for the base, and collect a variety of colorful embroidery threads to capture the depth of your chosen landscape.
Don’t forget carbon tracing paper for design transfer, and have some thin yarn handy for added texture.
Familiarize yourself with stitches like satin stitch and back stitch, and prepare a well-lit, comfortable workspace to enhance your creative process.
Planning Your Design Layout
Start by creating a series of thumbnail sketches to explore different layout options for your landscape.
Focus on the placement of key elements like horizon lines and trees, ensuring they fit well within your chosen embroidery hoop.
This initial mapping will help you visualize the harmony and flow of your design before you begin stitching.
Thumbnail Sketch Exploration
As you immerse yourself in the world of landscape embroidery, experimenting with multiple thumbnail sketches can considerably enhance your design layout.
Focus on mapping key elements like horizon lines and trees, ensuring balance and flow. Visualize your work within an embroidery hoop to gauge how the design fits before stitching begins.
Refine your sketches by adding compositional details and color to clarify your vision. Analyze each thumbnail for harmony and visual appeal, making adjustments to elevate the overall composition.
This thumbnail sketch exploration sets a strong foundation, guiding you toward a stunning finished piece that serves both art and purpose.
Key Element Mapping
While you plan your landscape embroidery, effectively mapping out key elements is crucial for achieving a harmonious design.
Follow these steps for successful key element mapping:
- Sketch multiple thumbnail designs to explore layout options and identify compositional elements.
- Use an embroidery hoop to outline your area of interest, positioning features like horizon lines and focal points.
- Analyze reference photographs for balance, noting how natural elements interact within the composition.
- Refine sketches by adding details and color, visualizing the final piece to make necessary adjustments before stitching.
This thoughtful approach guarantees your embroidery reflects the beauty of nature.
Transferring the Design to Fabric
To bring your landscape vision to life, start by selecting an image that speaks to you, perhaps from a memorable trip.
Once you’ve chosen your scene, simplify it using Lunapic.com to create a coloring book-style outline that makes tracing easier.
With carbon tracing paper in hand, you’ll carefully transfer the key elements onto your muslin fabric, setting the stage for your embroidery masterpiece.
Selecting the Right Image
Choosing the right landscape image is essential, not just for aesthetic appeal but also for fostering a personal connection to your embroidery project. Here’s how to select your starting point:
- Pick a landscape that resonates with you, ideally from a memorable trip.
- Use Lunapic.com to transform your image into a coloring book page for simplification.
- Draw a circle around the embroidery hoop on the printed image to define your stitching area.
- Utilize carbon tracing paper to accurately transfer the design onto fabric, ensuring a stable surface by securely attaching it to the hoop.
Tracing Techniques Explained
As you prepare to transfer your chosen landscape design to fabric, mastering tracing techniques is essential for achieving a clear and accurate outline.
Start by using carbon tracing paper, placing it carbon-side down on your muslin. Trace your design with a pencil or pen, ensuring the lines imprint clearly. Don’t forget to draw a circle around your embroidery hoop on the design; this helps guide placement on the fabric.
Secure the muslin tightly in the hoop to maintain even tension. Before you begin stitching, double-check the alignment, as adjustments can be tricky once the fabric is taut.
Choosing Stitching Techniques
When you commence on stitching landscapes, selecting the right techniques can transform your work from simple to stunning. Here are some techniques to take into account:
Selecting the right stitching techniques can elevate your landscape embroidery from simple to breathtaking.
- Satin stitch for smooth areas, like skies or water, giving a polished finish.
- Back stitch to outline features such as hills or tree trunks, enhancing definition.
- Long and short satin stitch to blend colors in larger areas, adding depth.
- French knots for texture, perfect for representing flowers or small elements.
Don’t be afraid to layer techniques, like couching stitch, to create unique surface textures, enriching your embroidery’s visual impact.
Stitching the Landscape
To bring your landscape to life through embroidery, start by selecting an enchanting reference image and carefully tracing it onto your muslin fabric with carbon tracing paper.
Use an embroidery hoop to keep your fabric taut, allowing ease of movement. Employ different stitches, like satin stitch for smooth areas and vertical stitches for tree details, adjusting the number of strands for varied effects.
Gradually fill larger features, embracing a free-hand approach to express your creativity. This method not only enhances the landscape but also allows for a personal touch, making your work a heartfelt gift or display piece.
Adding Finishing Touches
With your landscape beautifully stitched and ready for the next phase, it’s time to focus on the finishing touches that will elevate your piece.
Follow these steps to guarantee a polished presentation:
- Cut the muslin around the hoop, leaving a 1.5-inch margin.
- Create a running gathering stitch around the edge, avoiding knots for a clean finish.
- Gently pull the thread ends to gather the fabric, then tie a double knot for security.
- Cut a backing fabric piece, gluing it securely in place.
These finishing touches will make your embroidery taut and neat, perfect for gifting or showcasing your work!
Displaying Your Embroidery Art
How can you make your embroidery art truly stand out? Start by choosing a frame or hoop that complements your masterpiece, enhancing its visual appeal.
Consider adding a matboard or contrasting backing fabric to create a polished look. Once framed, secure your piece tightly to eliminate wrinkles, ensuring a professional finish.
Place your artwork in a well-lit area, ideally using natural light to showcase the intricate stitches and vibrant colors.
Don’t forget to rotate your displayed pieces regularly, keeping your decor fresh and allowing different aspects of your embroidery art to captivate your audience.
Enjoy sharing your creations!






