
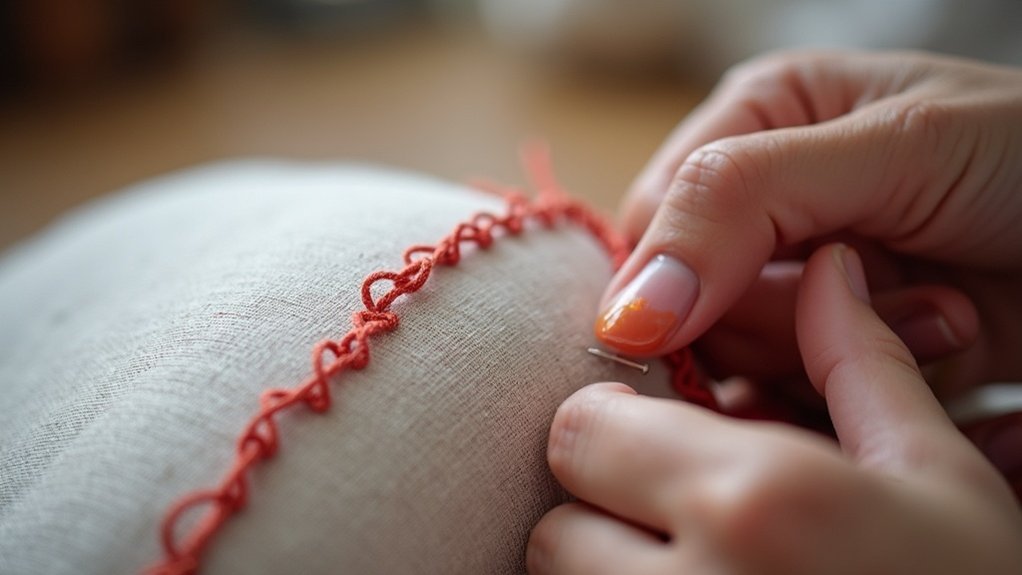
To overcast fabric edges for embroidery, start by gathering your materials like thread, scissors, and a sturdy needle. Trace a guideline on the wrong side of your fabric to keep stitches aligned. Thread your needle and begin your first stitch, ensuring even spacing between each one. Maintain consistency as you work along the edge, then tie off securely at the end. With just a few more tips, you’ll be on your way to impeccable finishes.
Key Takeaways
- Gather essential materials: fabric, embroidery thread, sturdy needle, scissors, and fabric marker for effective overcasting preparation.
- Trace a guideline on the fabric’s wrong side to ensure even stitching and avoid distortion.
- Use a zigzag stitch on the sewing machine for flexibility and to securely cover the fabric edges.
- Maintain consistent stitch length and spacing while sewing to achieve a polished and professional look.
- After overcasting, trim excess threads and press edges for a crisp finish, ensuring durability and aesthetic appeal.
Preparing Your Materials
Before you plunge into the art of overcasting fabric edges, it’s essential to gather all your materials to set the stage for a seamless stitching experience.
You’ll need your chosen fabric, vibrant embroidery thread, a sturdy needle, and a reliable pair of scissors. For efficiency, cut two arm’s lengths of thread—this’ll save you from constant re-threading.
Don’t forget a fabric marker or chalk; it’s vital for tracing a guideline along the fabric’s wrong side. Make certain your knot is securely positioned on the wrong side, keeping your work neat and polished, ready to delight those you serve with your craftsmanship.
Tracing the Guideline
Tracing the guideline is your first step toward achieving beautifully overcast edges. Grab a fabric marking tool and gently draw a straight line along the fabric’s wrong side, guaranteeing it’s visible during stitching.
Position this guideline accurately to prevent distortion in your work. As you trace, keep a light hand to avoid leaving permanent marks once you finish stitching. Measure the distance from the edge to the guideline for consistent stitch width throughout your project.
Before flipping the fabric, double-check the alignment to confirm accuracy. This careful attention to detail sets the foundation for your stunning embroidery.
Threading the Needle
Threading the needle is an essential step in your embroidery journey, transforming your prepared fabric into a canvas for creativity.
Start by measuring and cutting two arm’s lengths of thread, ensuring you’ve got enough to stitch without frequent interruptions. Gently insert the thread through the eye of the needle, pulling equal lengths on both sides. Tie a secure knot at the end to keep it from slipping through your fabric.
For visibility, choose a contrasting thread color initially. Don’t forget to flip the fabric to the wrong side, positioning that knot neatly out of sight as you begin your artistic endeavor.
Executing the First Stitch
Now that your needle’s threaded and you’re ready to bring your design to life, it’s time to execute that first stitch. Position your needle through the wrong side, hiding the knot. Bring it up along the guideline, creating a little bit of excitement as your vision begins to form.
- Embrace the rhythm of each stitch.
- Feel the fabric’s texture beneath your fingertips.
- Visualize the beauty emerging with each movement.
- Maintain even spacing for a polished look.
- Flip the fabric to admire your carefully crafted work.
With precision, keep each stitch consistent, ensuring a professional finish along the edge.
Maintaining Stitch Consistency
As you stitch along the fabric edge, keeping each stitch length uniform is key to achieving that polished look.
Aim for consistent spacing, about 1/4 inch apart, to prevent any unsightly gaps or overcrowding.
Regularly glance at your alignment to guarantee your stitches stay on track; a little attention now will make a world of difference in your embroidery’s overall charm.
Even Stitch Lengths
Achieving even stitch lengths is essential for a polished embroidery finish, and it’s easier than you might think. To create that professional look, focus on these key tips:
- Aim for uniform stitches, typically 1/8 to 1/4 inch apart.
- Always come up from the bottom along your guideline.
- Regularly check the right side of the fabric for appearance.
- Practice on scrap fabric to build confidence and steadiness.
- Maintain consistent thread tension to avoid length variations.
Consistent Stitch Spacing
Even with perfect stitch lengths, the beauty of your embroidery can falter if stitch spacing isn’t consistent.
To achieve that uniformity, start by measuring and marking guidelines on the fabric’s wrong side, ensuring they’re straight and evenly spaced. As you create your overcast stitch, always bring the needle up along these guidelines, maintaining equal lengths.
Regularly monitor your stitch distances, aiming for equal spacing to enhance your design’s overall appearance. Practice even tension on the thread, which helps keep your stitches neat and uniform.
If needed, use a ruler or fabric pen to maintain consistency throughout your stitching journey.
Monitoring Stitch Alignment
While you stitch, keeping a close eye on alignment is essential to achieving a polished look. As you work along the edge of your fabric, remember to:
- Refer to the guideline on the wrong side for accuracy.
- Maintain uniform stitch spacing of 1/8 to 1/4 inch.
- Use the right side to catch any misalignment instantly.
- Keep a steady hand and consistent thread tension.
- Regularly check for overlaps or crisscrossing stitches.
Completing the Overcast Stitch
As you commence on the final steps of the overcast stitch, it’s essential to maintain your focus on the guideline to guarantee each stitch is perfectly aligned. Bring the needle up from the bottom along the edge, ensuring even spacing for a harmonious finish. Avoid overlapping or crisscrossing; this neatness reflects your care.
Once you reach the end, shift to the wrong side, securing your thread with a tight knot. Push the needle through where the thread emerged, repeating this two to three times for security. Finally, trim the thread about an inch from the knot, ensuring your work looks impeccable.
Tying Off the Thread
Now that you’ve finished your overcast stitches, it’s time to securely tie off your thread for a polished look.
Bring your needle to the wrong side of the fabric and craft a few tight knots, using a small piece of fabric to anchor them in place.
Finally, snip the thread about an inch from the knot, ensuring it’s neat and tidy, ready for your masterpiece to shine!
Securing the Final Knot
Once you’ve completed your overcast stitches, it’s time to secure the final knot and guarantee your hard work stays intact. Shift to the wrong side of the fabric, pushing the needle through where you last stitched. This hides your knot, ensuring a polished finish.
- Loop the thread two to three times for security
- Use a small piece of fabric underneath to anchor the knot
- Cut the thread about an inch away for a tidy appearance
- Feel the satisfaction of a job well done
- Remember, your attention to detail serves the beauty of your creation on the right side!
Thread Cutting Techniques
Tying off your thread properly is essential for maintaining the integrity of your embroidery work. To do this, shift to the wrong side of your fabric, pushing the needle through to create a hidden knot.
Make sure you secure it well by tying the finishing knot two to three times; this prevents any unraveling. When you cut the thread, leave about an inch tail—this gives you enough length for a secure hold without risking any future mishaps.
Always review your knots; ensuring they’re tight and secure will save you from potential frustrations later on. Happy stitching!
Reviewing Your Work
As you finish your overcast stitches, take a moment to carefully examine your work, verifying every detail reflects your craftsmanship. The edge of the fabric deserves your full attention.
- Check for even spacing and uniform length.
- Verify stitches align perfectly with guidelines.
- Look for any overlaps or crisscrossing.
- Confirm all knots are tight and secure.
- Review under good lighting for quality assurance.
Taking this time reinforces your dedication to excellence and serves those who’ll cherish your creations.
This moment of reflection highlights your commitment to quality, ensuring your creations are treasured by others.
Embrace the satisfaction of knowing your work is as beautiful as it’s functional.






