
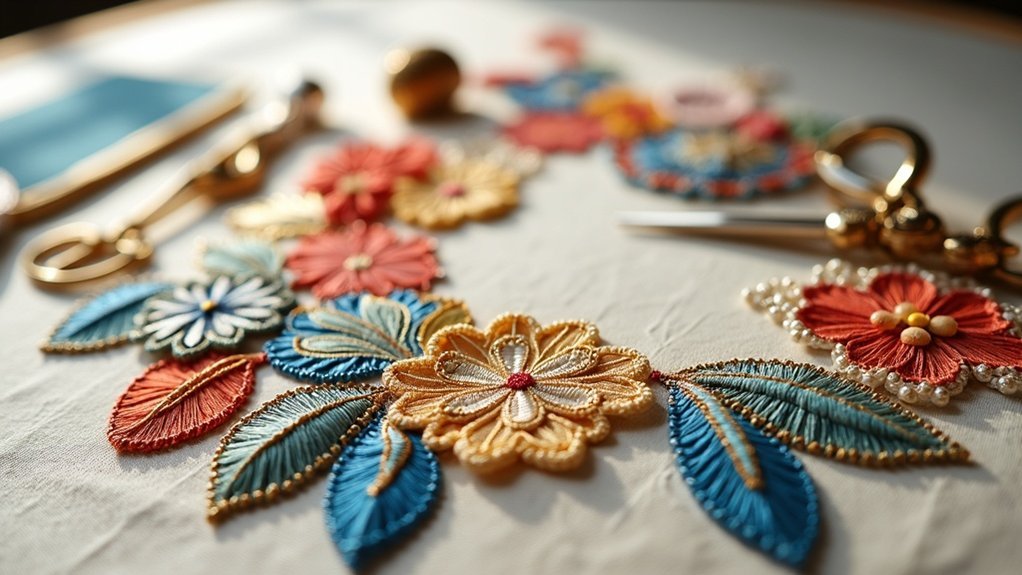
To applique in hand embroidery, start by gathering quality supplies like a Bohin applique needle, Aurifil thread, and a sticky thimble. Pre-wash and iron your fabric, then accurately cut your appliqué pieces. Secure the fabric, and use a backstitch to begin, keeping stitches close at pivotal points. Tuck any excess fabric for a neat finish and reinforce edges with straight or zigzag stitches. Master these techniques, and you’ll uncover even more tips for flawless appliqué!
Key Takeaways
- Begin with proper fabric preparation by pre-washing and ironing to remove wrinkles and ensure accurate cutting for your appliqué pieces.
- Use a Bohin applique needle and Aurifil thread for precise stitching and strong durability in your hand embroidery projects.
- Secure the appliqué in place with a slipknot technique and backstitch to prevent unraveling while stitching.
- Keep stitches close together at corners and curves for a neat finish, utilizing a sticky thimble for better control.
- Always inspect your work for loose threads and ensure edges are neatly tucked to enhance the quality of your final project.
Choosing the Right Supplies
When it comes to choosing the right supplies for hand embroidery appliqué, what tools will make your experience smoother and more enjoyable?
Start with a Bohin applique needle, size 11—it’s nice little yet effective for precision stitching. A needle threader simplifies threading, especially if you find traditional methods challenging.
Begin with a Bohin size 11 applique needle for precise stitching, and use a needle threader for effortless threading.
Opt for Aurifil thread; its thin weight and vast color selection guarantee your thread matches the appliqué piece seamlessly.
To protect your fingers, use a Polka Dot sticky thimble, enhancing control while reducing discomfort.
Finally, keep the lead end of the thread accessible to prevent tangling and guarantee smooth stitching.
Threading Your Needle With Ease
Threading your needle doesn’t have to be a frustrating step in your appliqué process; with the right techniques, it can be quick and effortless.
Use a needle threader by inserting the needle with the eye of the needle facing down. Place the thread in the threader and pop the button for smooth threading, particularly if you struggle with this task.
Always use the lead end of the spool to avoid tangling. When creating a knot, loop the tail end through itself several times.
Keep your thread thin for minimal visibility, and avoid cutting the end to prevent unraveling.
Happy stitching!
Essential Threading Techniques
Although you might think that threading techniques are trivial, they play an essential role in ensuring your appliqué work goes smoothly.
First, make sure to use the lead end of the thread spool to minimize tangling. If you’re using a needle threader, insert the needle with the eye side down and place the thread in the threader before pressing the button for quick results.
Create a simple knot by looping the tail end through itself multiple times to secure your stitching. Always match the thread color to the appliqué piece, avoiding cuts that can lead to fraying and tangles.
Mastering the Stitching Method
To master the stitching method in appliqué, start by carefully positioning your needle at the bottom point of the appliqué piece, bringing it up from the back of the fabric. For right-handed users, stitch from right to left, tucking the needle under the appliqué and pulling it out through the fold. Keep stitches closer together at pivotal points to guarantee the fabric is securely stitched around and doesn’t shift. Utilize a polka dot sticky thimble for better control. Remember to tuck in any excess fabric, or “flag,” and use a slipknot technique for added security.
| Step | Action | Purpose |
|---|---|---|
| 1 | Bring needle up through appliqué | Clean start |
| 2 | Stitch from right to left | Secure attachment |
| 3 | Keep stitches closer at points | Prevent lifting |
| 4 | Use a sticky thimble | Enhance precision |
| 5 | Tuck in excess fabric and slipknot | Secure finishing |
Tips for Secure Finishing
To guarantee a polished finish in your hand embroidery applique, start by tucking in any excess fabric, or flags, around the edges of your piece.
Master the secure slipknot technique to anchor your stitches, repeating it for extra stability.
Finally, always check for loose threads before wrapping up, as this small step can greatly enhance the overall quality of your work.
Tucking Excess Fabric
When you’re ready to tuck in the excess fabric, often referred to as a “flag,” this step is essential for achieving that polished look in your hand embroidery appliqué.
Gently fold the flag under, ensuring it lies flat against the base fabric. To secure the tucked fabric, take a small bite of the underlying material with your needle, creating a slipknot that anchors the appliqué. For added security, repeat this process twice.
After tucking, always check for loose threads to maintain your work’s integrity. Using a Bohin appliqué needle and polka dot thimble can make tucking excess fabric easier.
Secure Slipknot Technique
Mastering the secure slipknot technique is essential for achieving a polished finish in your hand embroidery appliqué.
To create a secure slipknot, take a bite of the fabric with your needle, wrapping the thread around for a firm hold. Repeat this slipknot technique twice to reinforce your stitches, preventing any unraveling.
A consistent application of this method guarantees uniformity in your stitching, enhancing the overall neatness of your work. This technique is particularly effective when shifting to machine stitching later, providing a dependable foundation.
Embrace this technique to elevate your embroidery and serve your creative vision beautifully.
Checking Loose Threads
Inspecting your hand embroidery for loose threads is a crucial step in ensuring a polished and professional finish.
As you review your work, focus on the edges of the applique where the fabric meets the background; these areas are prone to fraying. Use sharp scissors to trim stray threads carefully, and remember to address any tail ends that may have been overlooked.
After securing your stitches with a slipknot technique, double-check for loose ends that need tucking or trimming. This final inspection will catch potential issues, ensuring your applique remains secure and visually appealing for years to come.
Common Mistakes to Avoid
Applique in hand embroidery can be a delightful process, but common mistakes can easily mar your efforts. To keep your stitches even and your design pristine, avoid these pitfalls:
Applique in hand embroidery is enjoyable, but watch out for common mistakes that can affect your design’s quality.
- Don’t choose thread colors that match the background; they’ll make your stitches visible and diminish the design.
- Always insert your needle into the threader with the eye side down for a smoother threading experience.
- Never cut the end of your stitching thread; it can lead to tangling and insecure stitches.
Transitioning to Machine Stitching
Shifting to machine stitching not only speeds up your process but also enhances precision in your applique work.
You’ll need to equip yourself with the right tools, like a sharp needle and quality thread, to achieve a clean finish.
As you adjust your machine settings, focus on mastering techniques that guarantee a smooth shift, so your finished piece looks professional and polished.
Benefits of Machine Stitching
While hand stitching offers its own charm, embracing machine stitching can revolutionize your applique projects.
By shifting to machine stitching, you’ll enjoy several key benefits:
- Speed: Complete your projects faster, allowing you to serve others with more finished pieces.
- Consistency: Achieve uniform stitch length and tension for a polished, professional finish.
- Versatility: Utilize various stitch options, like zigzag or decorative stitches, to enhance your designs.
With machine stitching, you’re not only reducing physical strain but also elevating the quality of your work, making it a more comfortable and efficient choice for your creative endeavors.
Essential Machine Tools
Upgrading your toolkit is essential for a seamless shift to machine stitching in applique projects.
The next thing you’ll need is a quality sewing machine with adjustable stitch settings and a walking foot to guarantee even fabric feeding.
Don’t forget a sharp needle suited for your fabric, like a universal or ballpoint, for clean stitches.
Invest in high-quality thread, such as Aurifil, for durability and appearance.
A rotary cutter and self-healing mat enhance cutting accuracy, while a stabilizer prevents fabric shifting during stitching, assuring a precise finish.
Equip yourself well, and your applique projects will shine!
Techniques for Smooth Transition
To guarantee a smooth shift from hand to machine stitching in your applique projects, start by meticulously preparing your fabric. Trim all loose threads and secure your fabric in place.
Here are some key techniques to take into account:
- Use a straight or zigzag stitch to reinforce the hand-appliqued edges, adding durability and a little bit of flair.
- Practice on scrap fabric to fine-tune tension and stitch length for ideal results.
- Employ a walking foot to prevent fabric shifting as you navigate curves and points.
Finally, backstitch at the beginning and end to secure your work and prevent unraveling.






