
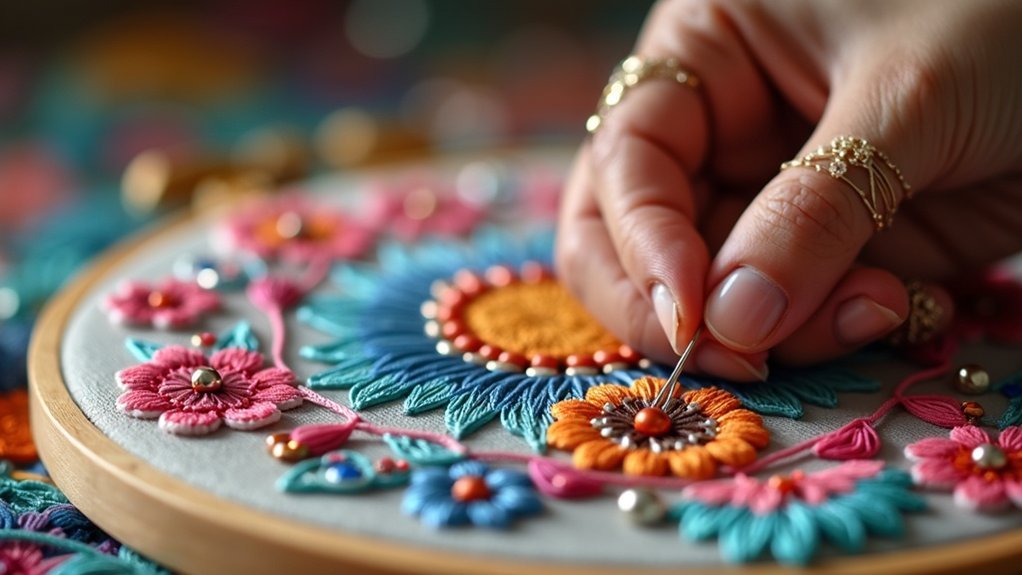
To add beads to your embroidery, start by choosing the right beads, like glass seed or Delica beads for smooth stitching. Use a specialized beading needle and durable thread to guarantee your design stays intact. Secure beads with anchor stitches such as fly stitch or buttonhole stitch. Plan bead placement carefully to maintain balance in your design. With practice, you’ll master various techniques and create stunning bead-embellished projects. There’s so much more to explore beyond these basics!
Key Takeaways
- Select appropriate beads, like glass seed beads or Delica beads, for smooth stitching and aesthetic appeal.
- Use specialized beading needles and strong nylon thread for ease of use and durability.
- Begin with a running stitch to anchor beads, or use anchor stitches for added security.
- Plan bead placement by sketching locations to maintain design cohesion and avoid overcrowding.
- Practice on durable fabrics like cotton or felt to support bead placement and enhance design quality.
Choosing the Right Beads for Your Project
When you’re diving into the world of embroidery, choosing the right beads can make all the difference in your project’s outcome.
Opt for glass seed beads in sizes 11/0 or 15/0 for their smoothness and versatility, perfect for intricate designs. Delica beads, with their cylindrical shape, lend a uniform appearance, enhancing detailed stitches.
Bugle beads can add dimension, but use them cautiously, as rough edges might snag your embroidery thread or delicate fabrics. Always avoid heavy stone or wood beads on fragile materials, and remember to test bead compatibility with your needle and thread for flawless stitching.
Happy beading!
Essential Tools for Beading Embroidery
To master the art of beading in your embroidery, you’ll need specialized beading needles that glide effortlessly through fabric while accommodating your chosen beads.
Pair these with strong beading thread, like durable nylon, to guarantee your designs stand the test of time.
With the right tools, you’ll transform your embroidery into a stunning masterpiece that sparkles with every stitch.
Recommended Beading Needles
Choosing the right beading needle is essential for achieving a seamless and beautiful embroidery project, especially as these specialized tools are crafted to enhance your beading experience.
Beading needles, with their longer, slimmer profiles, make threading beads a breeze. Consider using milliner needles for their sharp points and long eyes, perfect for multiple thread strands and larger beads. Their flexibility guarantees your embroidery technique remains intact without distortion.
Test the compatibility of your chosen beading needle with your selected beads to avoid snagging. For accessibility, a big eye needle accommodates thicker thread, making bead embroidery enjoyable for everyone.
Essential Thread Choices
With the right beading needle in hand, the next step is selecting the thread that will best complement your embroidery project. For bead work, choose embroidery floss—using one strand guarantees your design maintains the desired thickness and color consistency.
Nylon beading thread is another excellent option, offering strength and invisibility for various bead types. In a pinch, fishing line serves as a durable alternative.
Confirm your beading needle is long and slender for easy threading. If you’re working with larger beads, a big eye needle will make threading thicker materials a breeze, helping you seamlessly add beads to your embroidery.
Techniques for Adding Beads to Stitches
As you explore the art of adding beads to your embroidery, you’ll discover a variety of techniques that can elevate your designs.
Start with the running stitch, anchoring your first bead at regular intervals for a structured look. Incorporate anchor stitches like fly or detached chain stitch to secure beads securely, adding flair.
The buttonhole stitch captures beads beautifully, creating layers in your piece. Experiment with laced and whipped running stitches for added texture, while French knots can showcase tiny seed beads, ensuring durability and visual appeal in your hand embroidery projects.
These techniques make your bead embroidery truly shine.
Planning Your Bead Placement
Before you start embellishing your fabric, grab some washable markers and sketch out where each bead will go to make sure everything aligns perfectly.
Keep an eye on the overall design—too many beads can overcrowd your masterpiece, while too few can leave it feeling sparse.
Finally, test your beads against your chosen stitches to guarantee they play nicely together and enhance your creation.
Mapping Bead Locations
To create a stunning embroidery piece, mapping bead locations is essential, since it guarantees that each bead enhances the design rather than detracts from it.
Here’s how to effectively plan your bead placement:
- Use washable markers or pencils to outline areas on your fabric for precise bead placement.
- Consider existing stitched patterns to guide bead placement, ensuring a cohesive look.
- Plan the sequence of bead application to allow smooth access around other stitches.
Taking a step back to assess your mapped placements helps visualize the final design, allowing for adjustments before you start stitching.
Happy embroidering!
Avoiding Overcrowded Designs
Mapping bead placements sets the stage for a visually appealing embroidery piece, but it’s just as important to avoid overcrowding your design.
Begin by using washable markers to outline areas for beading, ensuring you can incorporate beads without overwhelming the small piece. Plan bead placements carefully, allowing fill stitches to lay flat around your beads.
As you stitch, step back to assess your work, adjusting as needed to maintain balance. Consider using existing patterns, like stripes or motifs, as guides.
This thoughtful approach will help you bring your needle back to a harmonious design, enhancing the overall beauty of your embroidery.
Considering Stitch Compatibility
While planning your bead placements, it’s crucial to contemplate how different stitches will interact with your chosen beads.
Consider these key aspects:
- Stitch Compatibility: Use running stitches or backstitch, as they easily accommodate beads without distortion.
- Design Mapping: Outline bead placements with washable markers, guaranteeing proper alignment and spacing on the back of the fabric.
- Weight Assessment: Verify your fabric supports the beads’ weight, avoiding damage by selecting sturdier materials for heavier beads.
Recommended Fabrics for Bead Embroidery
When it comes to bead embroidery, selecting the right fabric is essential for achieving stunning results. Durable fabrics like cotton or felt are ideal, as they withstand the weight and tension of beads without distortion.
Selecting the right fabric is crucial for beautiful bead embroidery; choose durable options like cotton or felt for the best results.
Avoid delicate fabrics such as silk, which can be damaged by heavy beads. For intricate designs, opt for materials with a tighter weave, ensuring secure bead placement and preventing distortion.
If you’re more experienced, experimenting with finer fabrics can yield unique textures. Ultimately, your choice of fabric greatly influences bead placement, making it a crucial step in the embroidery process.
Choose wisely!
Tips for Thread Selection
Selecting the right thread for your bead embroidery can greatly impact the overall quality and appearance of your work. Here are some tips for effective thread selection:
- Use embroidery floss: Opt for one strand to maintain consistency and ease of use, especially with smaller beads.
- Choose the right beading thread: Nylon is ideal for its strength and invisibility, ensuring your beads stay secure without detracting from the design.
- Maintain a consistent color palette: This enhances your embroidery and complements your beads, making your piece visually appealing.
Organization Strategies for Beads
To create a seamless embroidery experience, organizing your beads effectively can make all the difference. Use small, clear plastic containers with screw-on lids to separate and label different colors and types of beads. This way, you can quickly access what you need.
Employ a bead tray with designated slots to keep your beads organized during work. To minimize rolling, consider a flocked or felt surface for your workspace. A bead mat can also help, providing a non-slip area.
Finally, utilize double-sided sticky tape to secure your containers and tools, ensuring everything stays in place while you create beautiful embroidery.
Practice Projects to Develop Your Skills
As you immerse yourself in the world of bead embroidery, starting with simple practice projects can greatly boost your confidence and skill level.
To enhance your abilities, consider these ideas:
Consider exploring new techniques and materials to elevate your bead embroidery skills and inspire your creativity.
- Create holiday ornaments or small decorative patches to familiarize yourself with bead placement.
- Use one or two bead embroidery samplers, exploring stitches like seed, running, and back stitch to see how beads interact.
- Experiment with various bead types, adding beads into existing patterns to enhance texture.
Document your progress in a journal, helping you refine your approach as you stitch to attach beads with purpose and creativity.






