
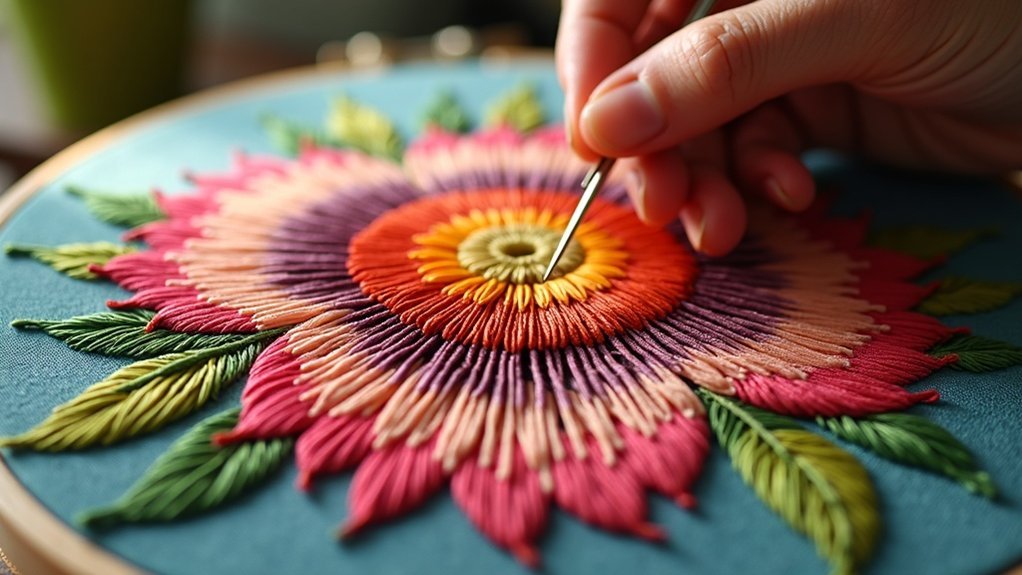
To master long and short stitch, first, gather your materials like a fine needle, embroidery floss in three colors, and a hoop. Draw your design and outline it with a split stitch. Use guideline stitches to direct your work, staggering stitch lengths to avoid uniformity. Fill shapes with your colors, blending them for depth. Practice regularly for improvement. With these techniques, you’ll create textured pieces that pop, and there’s so much more to discover as you go.
Key Takeaways
- Use a fine hand embroidery needle and one strand of embroidery floss for precise long and short stitching effects.
- Select at least three complementary colors to create depth and natural shading in your design.
- Draw guideline stitches to assist with stitch direction and maintain consistent filling throughout the embroidery.
- Vary the lengths of your stitches to avoid uniformity and achieve a painterly texture in your work.
- Practice regularly and use guideline grids to enhance your stitching accuracy and confidence in long and short stitch techniques.
Understanding Long and Short Stitch
Long and short stitch is a versatile embroidery technique that can elevate your projects with its unique painterly effect. To master this technique, use long and short stitches that vary in length, avoiding rows for a natural appearance.
Begin by drawing guideline stitches to help with stitch direction and guarantee consistent filling. This approach enhances your thread painting, creating depth and dimension.
Materials Needed for Long and Short Stitch
To successfully commence your long and short stitch embroidery journey, gathering the right materials is crucial. You’ll need a fine hand embroidery needle (size 9 to 12) for precise stitching, one strand of embroidery floss for a delicate finish, and at least three colors that complement each other. Prepare your fabric by marking your design with water-soluble fabric markers and outline it using an outline stitch. An embroidery hoop helps maintain tension while you stitch, and a pair of scissors guarantees clean cuts as you fill the shape.
| Material | Purpose | Quantity |
|---|---|---|
| Fine hand embroidery needle | Precise stitching | 1 |
| One strand of embroidery floss | Smooth blending | 1 strand |
| Three colors | Depth and variation | At least 3 |
Preparing Your Fabric and Design
Before you immerse yourself in stitching, it’s essential to prepare your fabric and design properly. Start by selecting a fine hand embroidery needle (size 9-12) suitable for your fabric.
Next, draw your design on the fabric, using an outline stitch like split stitch to create a clear boundary for your long and short stitches. Choose at least three colors of floss that blend well together for a seamless shading effect.
Consider drawing guidelines on the fabric to help with stitch direction and placement. Finally, guarantee the fabric is taut in your embroidery hoop to prevent puckering and facilitate easier stitching.
Stitching Techniques for Long and Short Stitch
While you might feel tempted to dive right into stitching, mastering the techniques for long and short stitch will greatly enhance your embroidery’s visual appeal.
Start by outlining your shape with a split stitch for a smooth edge. When you fill in a shape, use guideline stitches to maintain direction, working from the middle and outwards.
Stagger the lengths of your stitches to avoid uniformity and create a natural texture. Remember to vary your stitch lengths and avoid overlapping for that ragged edge.
This approach will enrich your design and serve others with beautifully textured embroidery.
Layering and Blending Stitches
Layering and blending stitches can transform your embroidery from flat to fantastically dimensional. Start by creating a foundation row of alternating long and short stitches, leaving space for additional layers.
Vary your stitch lengths to enhance the natural look and blend colors seamlessly, especially when shifting hues. Use guideline stitches to guarantee direction and consistency, preventing tangles. Always come up through previous stitches for smoother shifts and better shading.
Experiment with different color combinations and lengths—ragged edges can enhance the blending effect, resulting in a more realistic, painterly appearance that captivates and serves the viewer beautifully.
Tips for Mastering Long and Short Stitch
To master long and short stitch, you need to practice regularly; it builds your skill and confidence.
Don’t forget to use guideline stitches to keep your direction consistent and shapes accurate. This combination will help you create beautifully blended and natural-looking embroidery.
Practice Regularly
Regular practice is essential for mastering long and short stitch techniques in embroidery. To enhance your skills, practice regularly and focus on staggering stitch lengths for a blended look.
Try a short stitch tutorial to refine your technique, and remember to shorten stitches around curves for a smoother finish. While stitching, listen to music or podcasts to relax and improve your focus. This enjoyable atmosphere helps your techniques improve.
Consider using guideline grids to maintain proper stitch direction, making it easier to fill areas effectively. With consistent practice, your hand embroidery will flourish, serving others beautifully.
Use Guideline Stitches
Using guideline stitches can greatly enhance your long and short stitch embroidery by providing a clear framework for your work. Draw vertical and horizontal guideline stitches on your fabric to visualize placement and orientation. Always start your stitches in the same hole as the previous layer to avoid tension issues. As you fill sections, regularly consult your guidelines, adjusting your stitch angles to follow the contours. This not only maintains stitch direction but also creates a cohesive look.
| Guideline Stitches | Purpose |
|---|---|
| Vertical Lines | Help visualize stitch placement |
| Horizontal Lines | Aid in maintaining direction |
| Layering Technique | Guarantee smooth changes |
Exploring Advanced Applications of Long and Short Stitch
As you explore advanced applications of long and short stitch, you’ll discover that these techniques can transform your embroidery into stunning works of art.
Focus on creating realistic animal fur or botanical illustrations by mastering color blending and layering techniques. Experiment with varying thread thicknesses for dramatic shading and highlights. Incorporate silk shading alongside long and short stitch for a painterly effect.
Use guideline stitches to maintain direction and guarantee even fills. For deeper insights, engage with resources like Trish Burr’s tutorials or workshops from the Royal School of Needlework to refine your skills and elevate your embroidery projects.






